Bullet making pics.

Al Nyhus

"It'll never work!"
Well, it's snowy and freezing cold, so it's a good time to make bullets. I hate making cores with a passion, but unless you buy 'em from Charlie Hood it's something that needs to be done before anything else happens.

I'll start from the beginning and add pics as my process goes along. Hopefully we can exchange info and learn something from each others process. :)

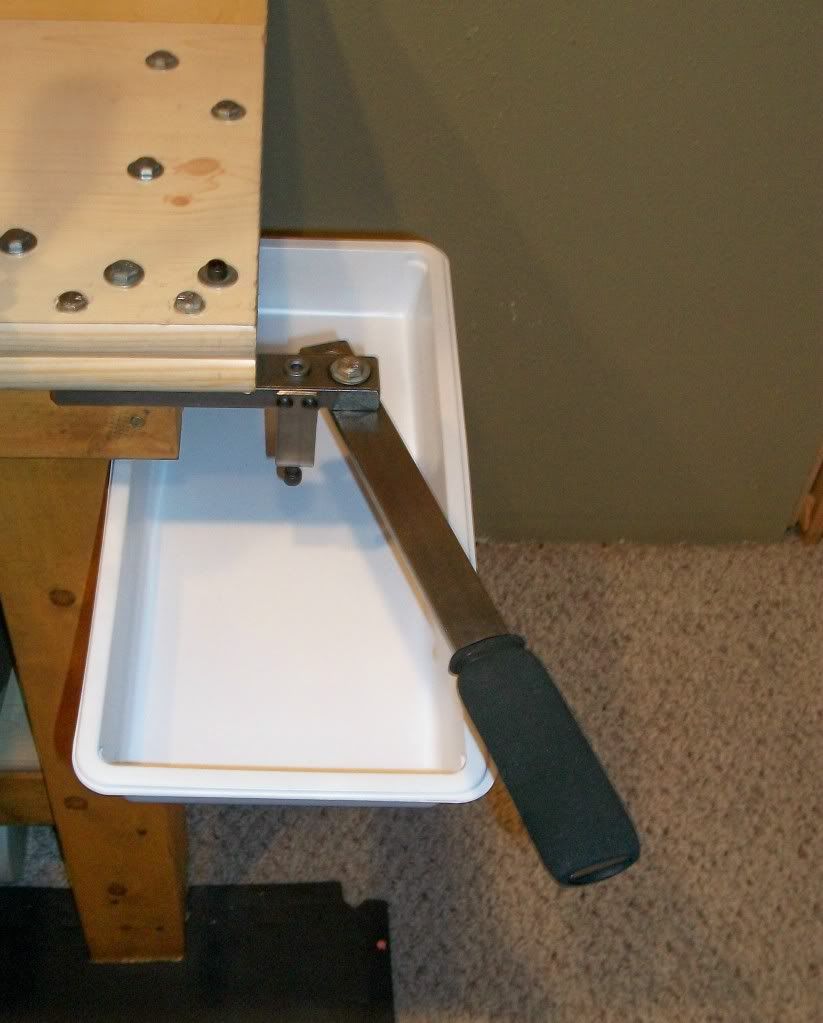
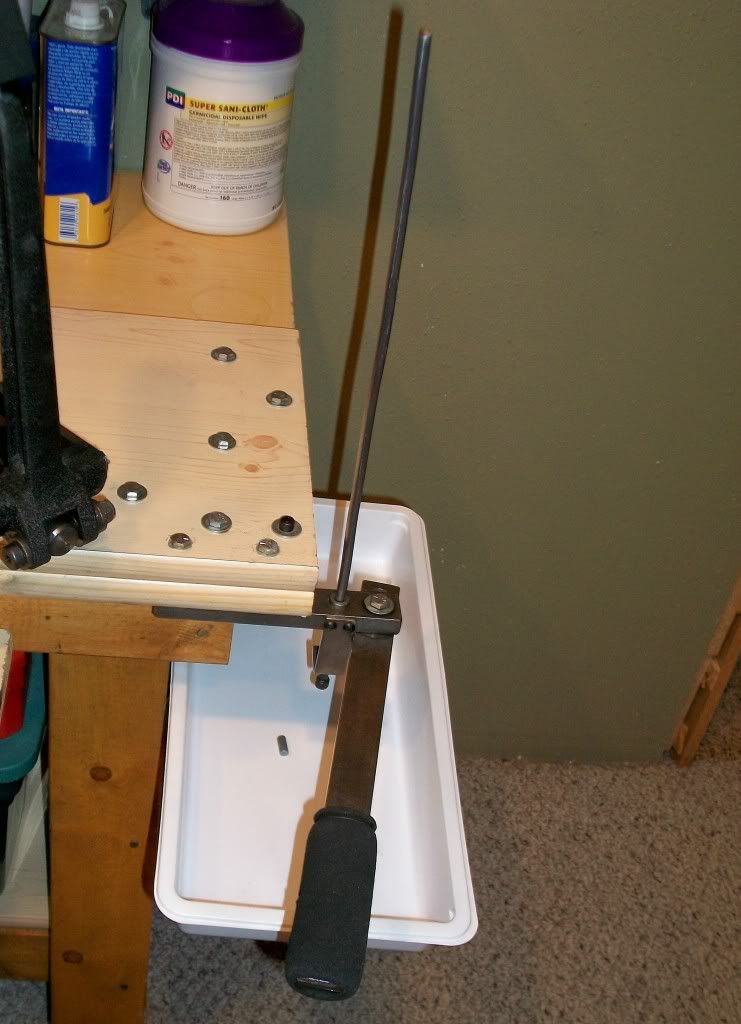
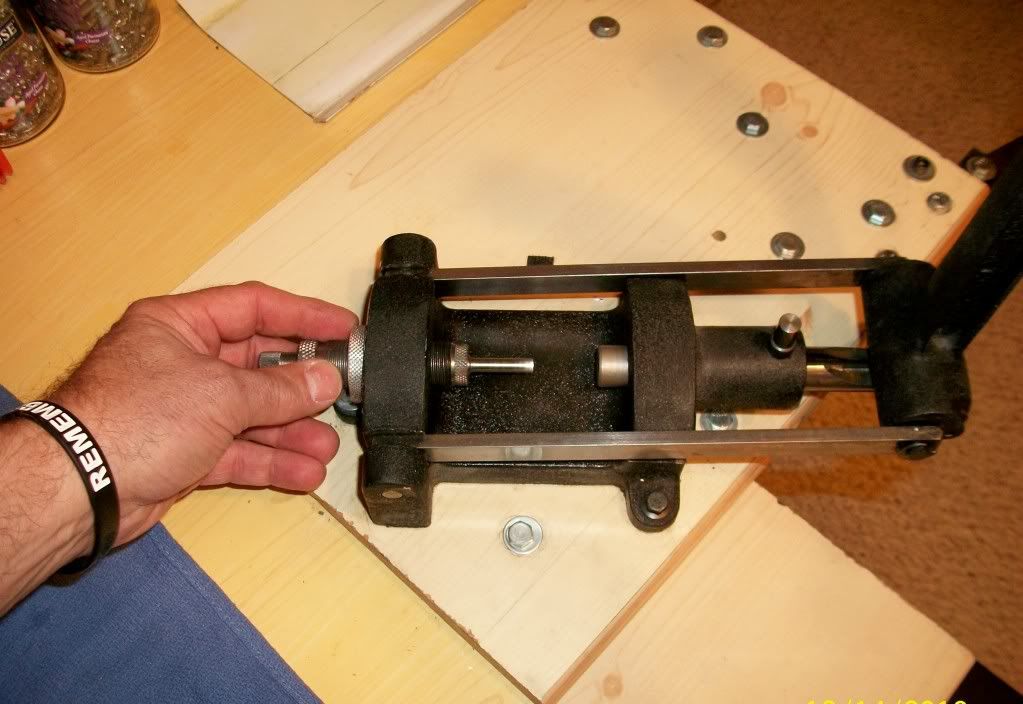
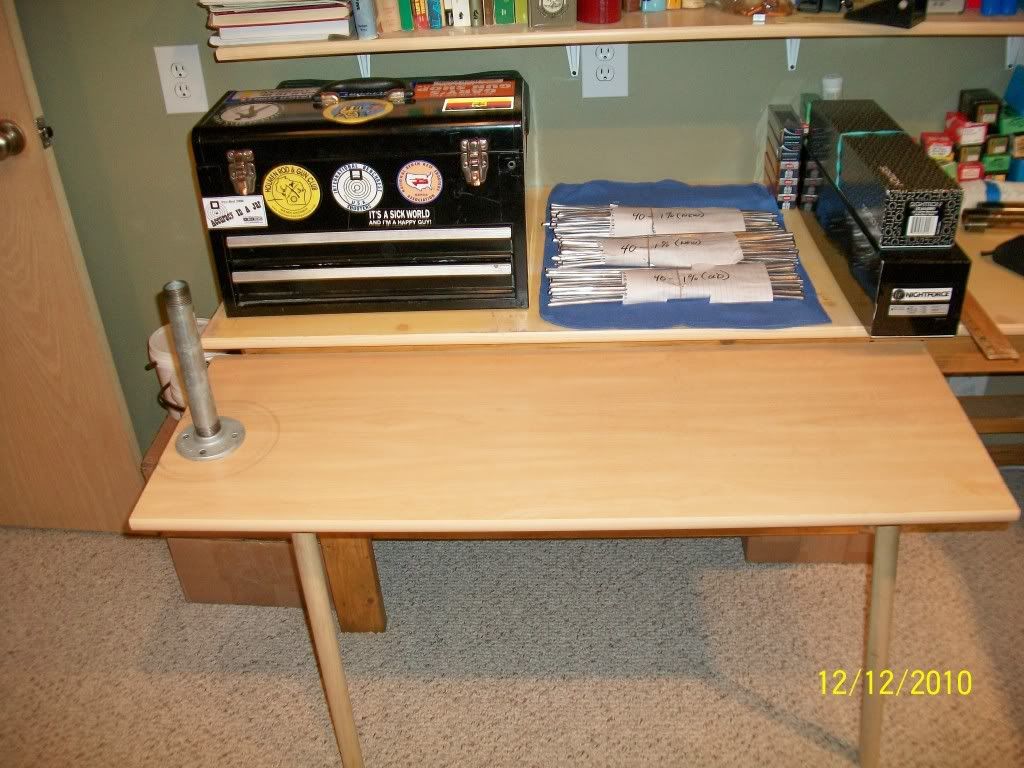
For cutting the wire, I use a table that hinges along the side of one of the work benches. It has a 1" NPT pipe flange screwed to it for a 'spindle'.

1-1.jpg


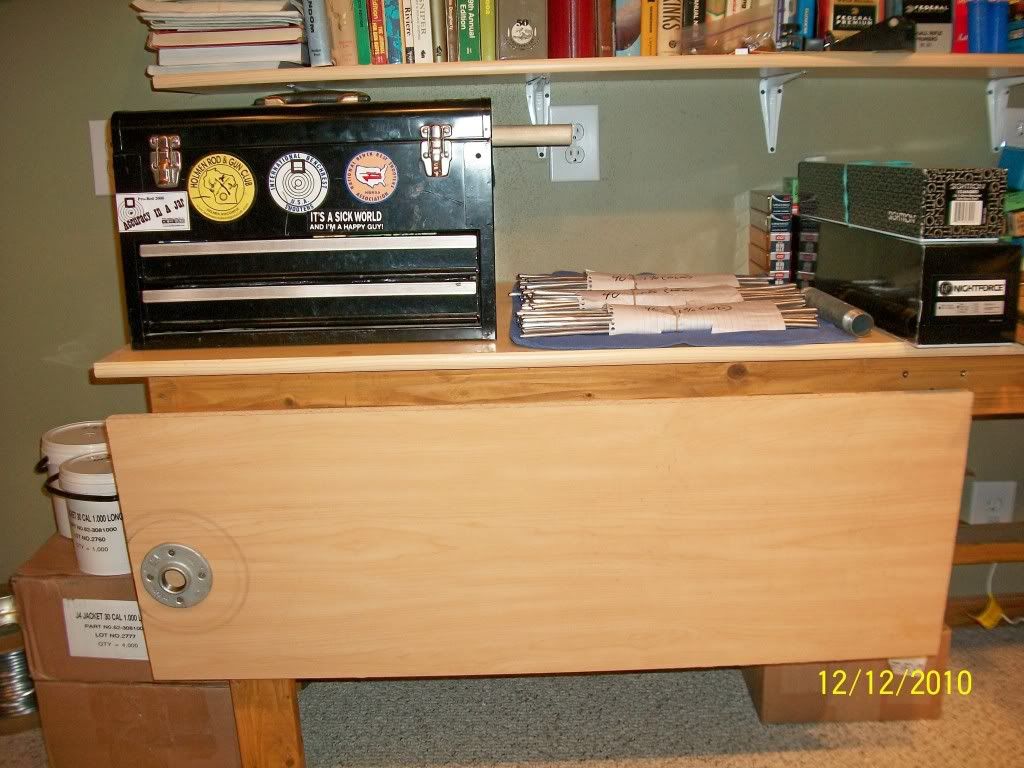
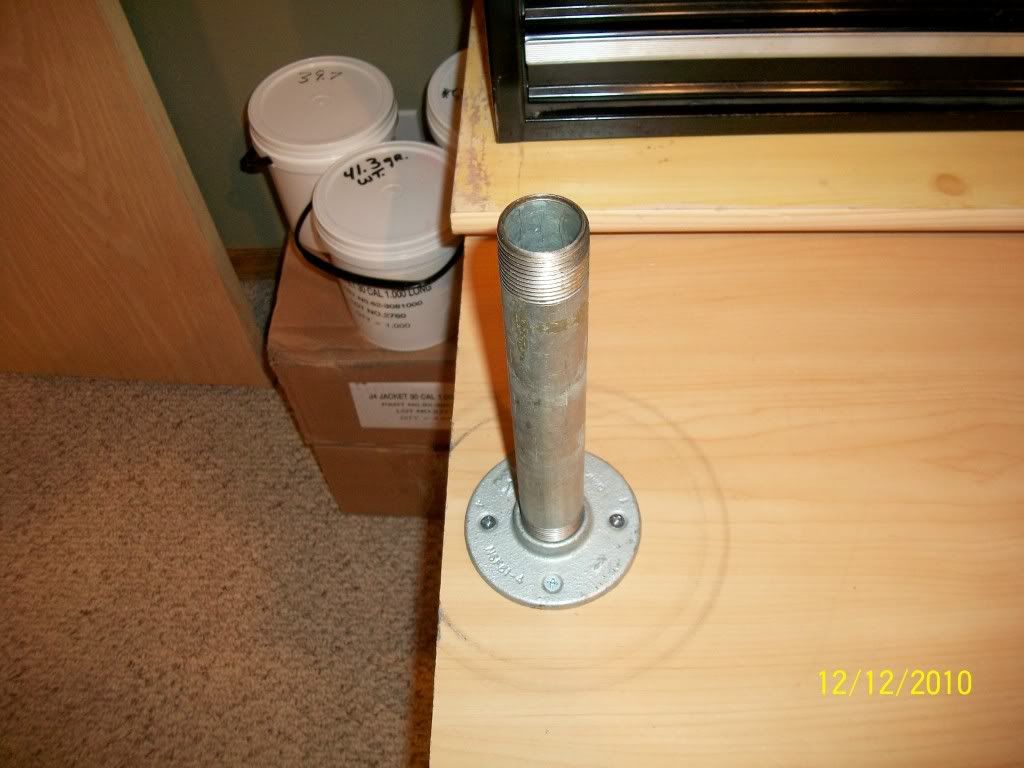
I flip it up, screw in a couple of legs and mount a 'spindle' on the pipe flange. The 'spindle' is a 1" NPT nipple.

2.jpg


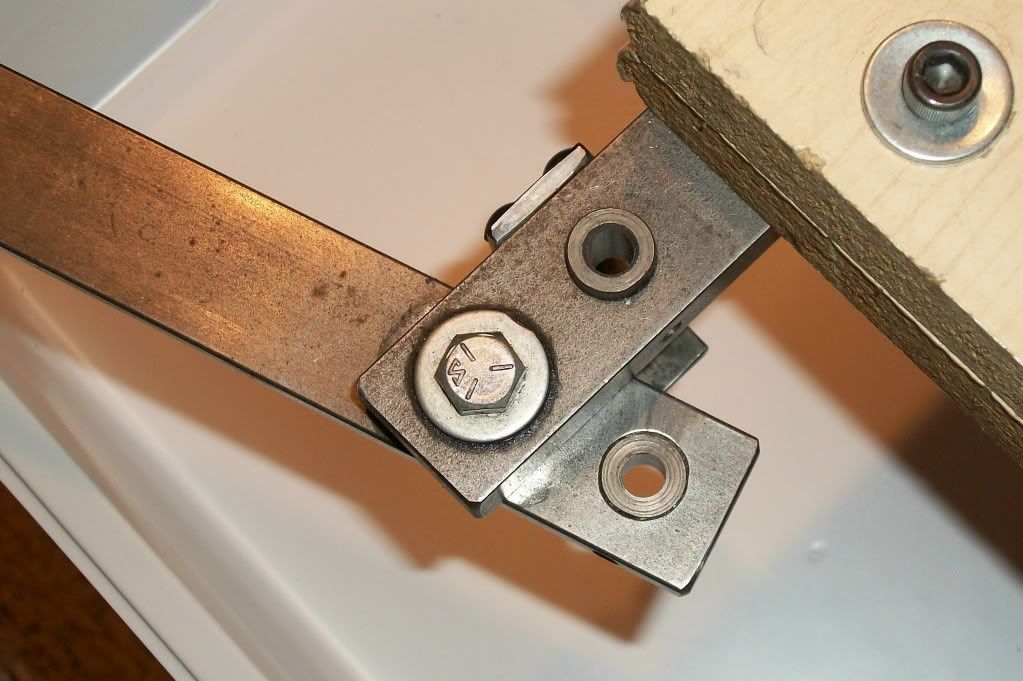
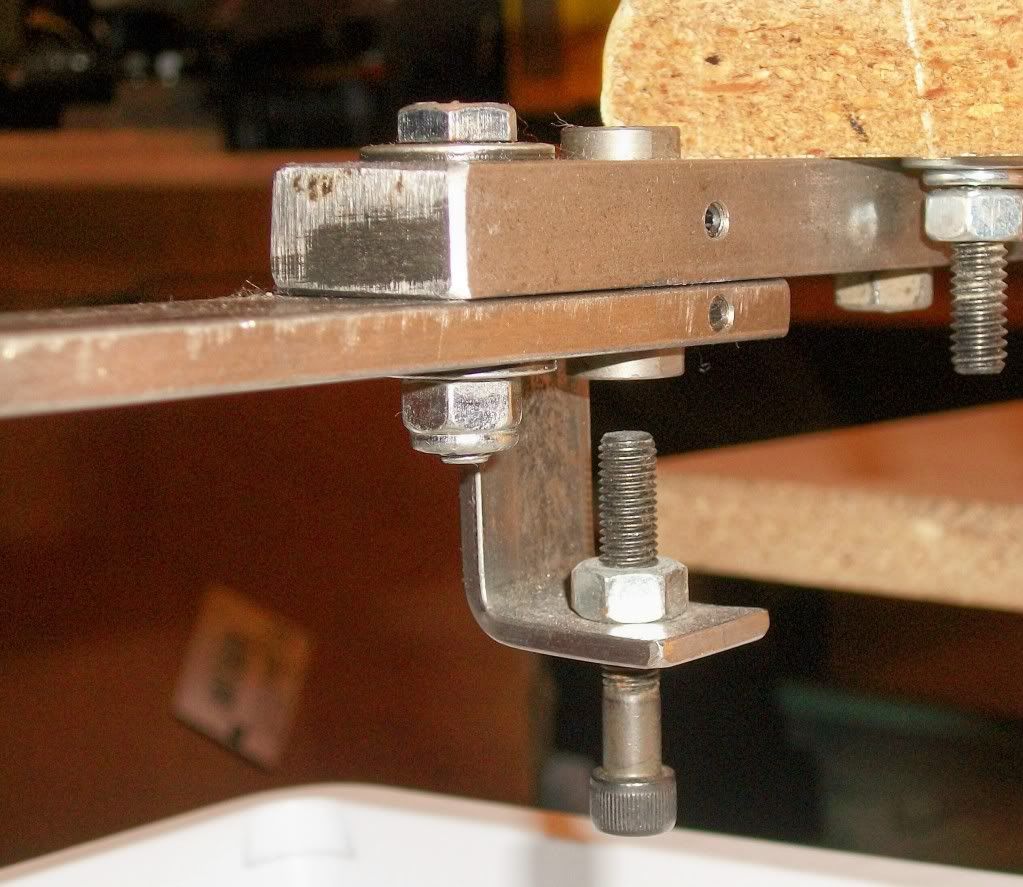
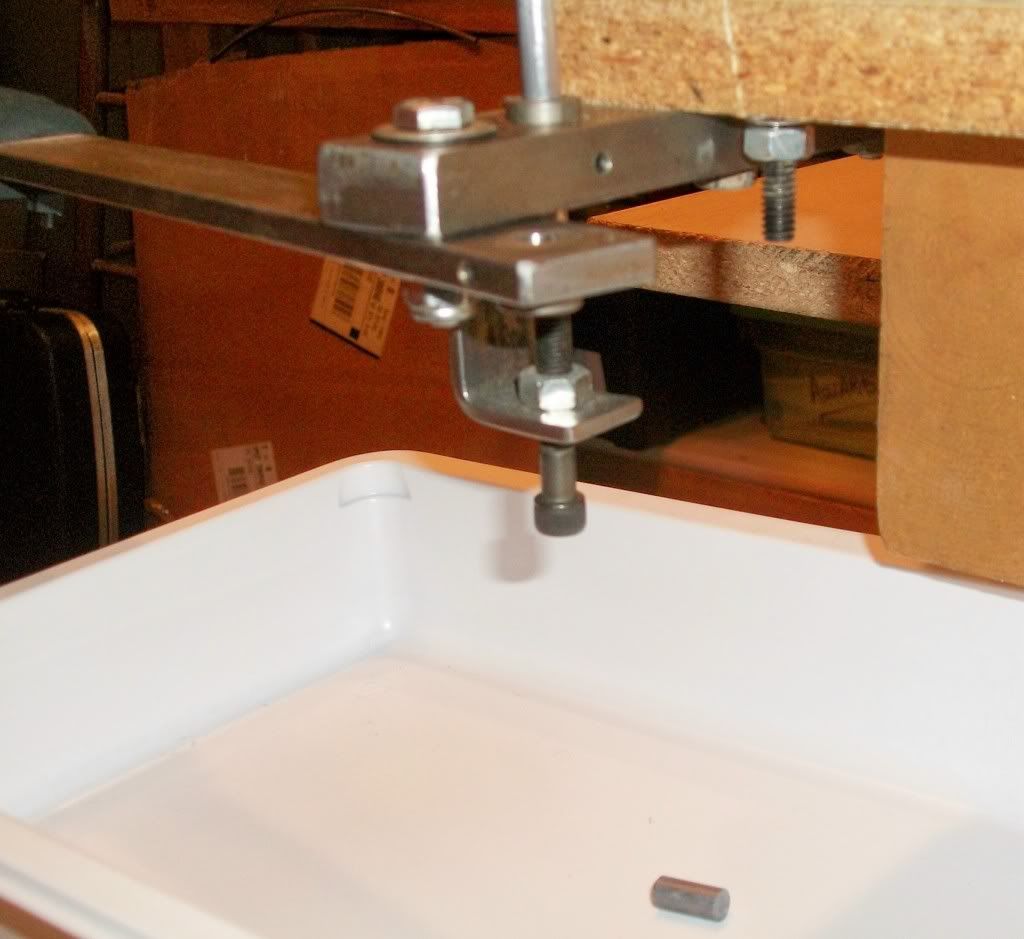
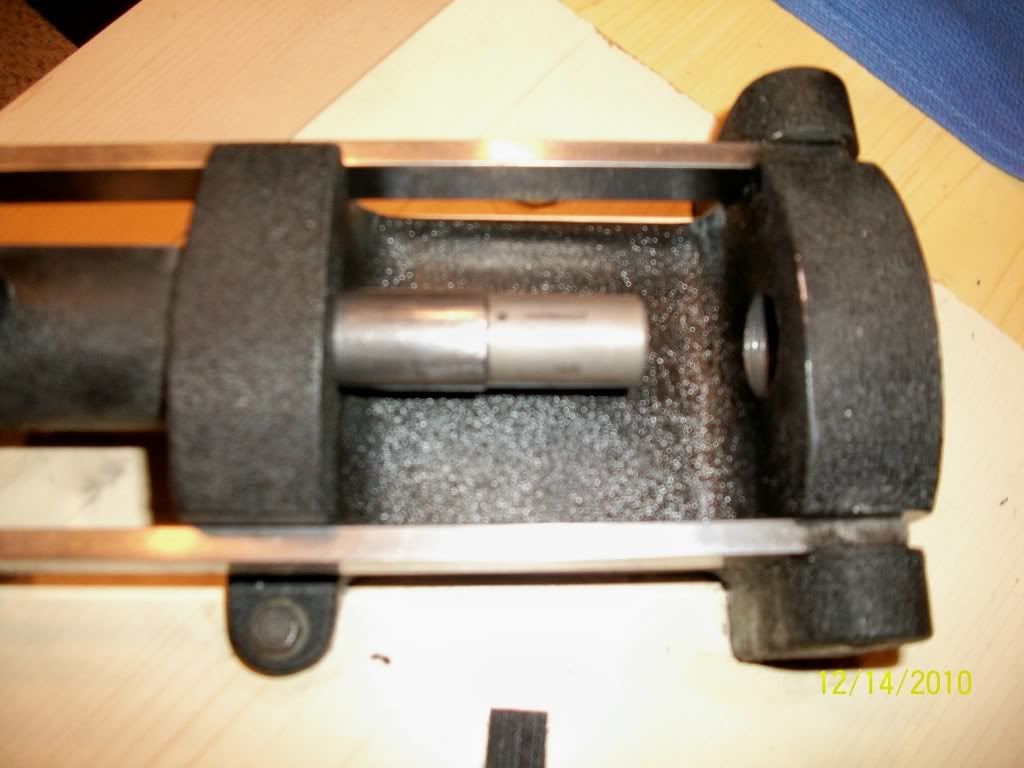
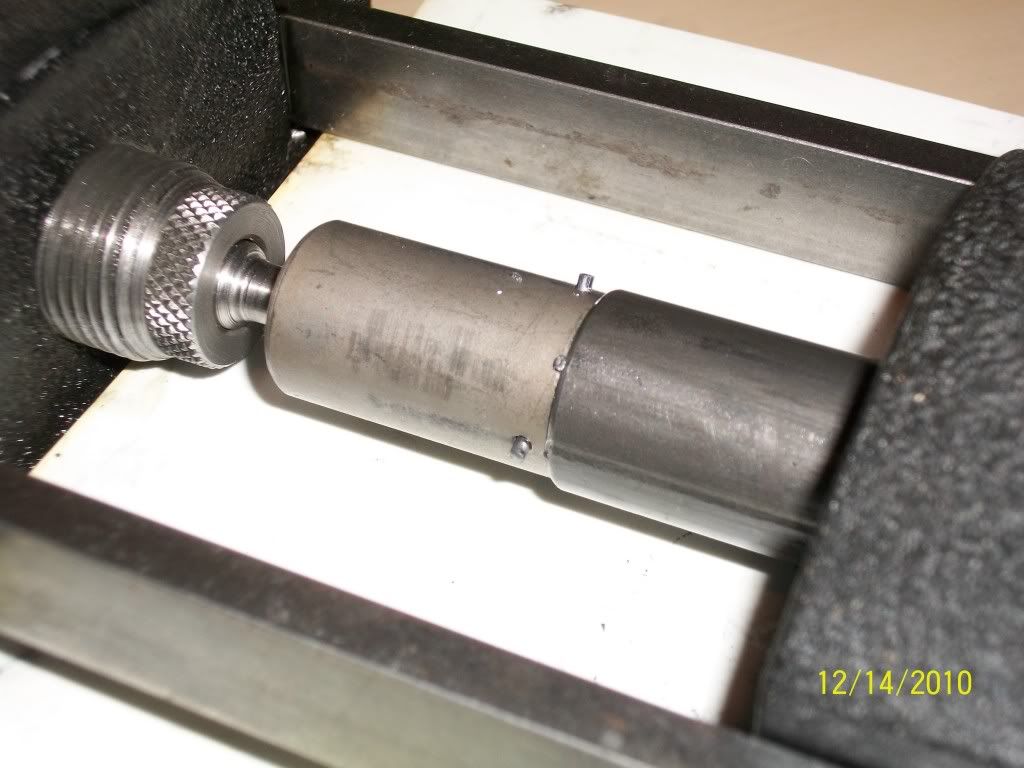
Closer look at the lash up. It's pretty sophisticated, so don't drool all over your keyboards. ;)

3-1.jpg


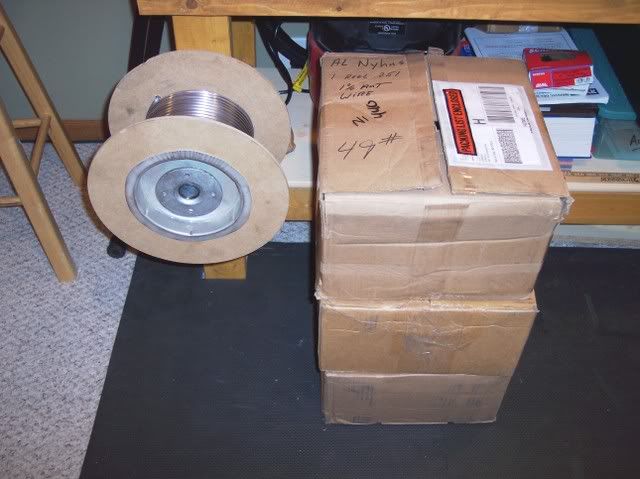
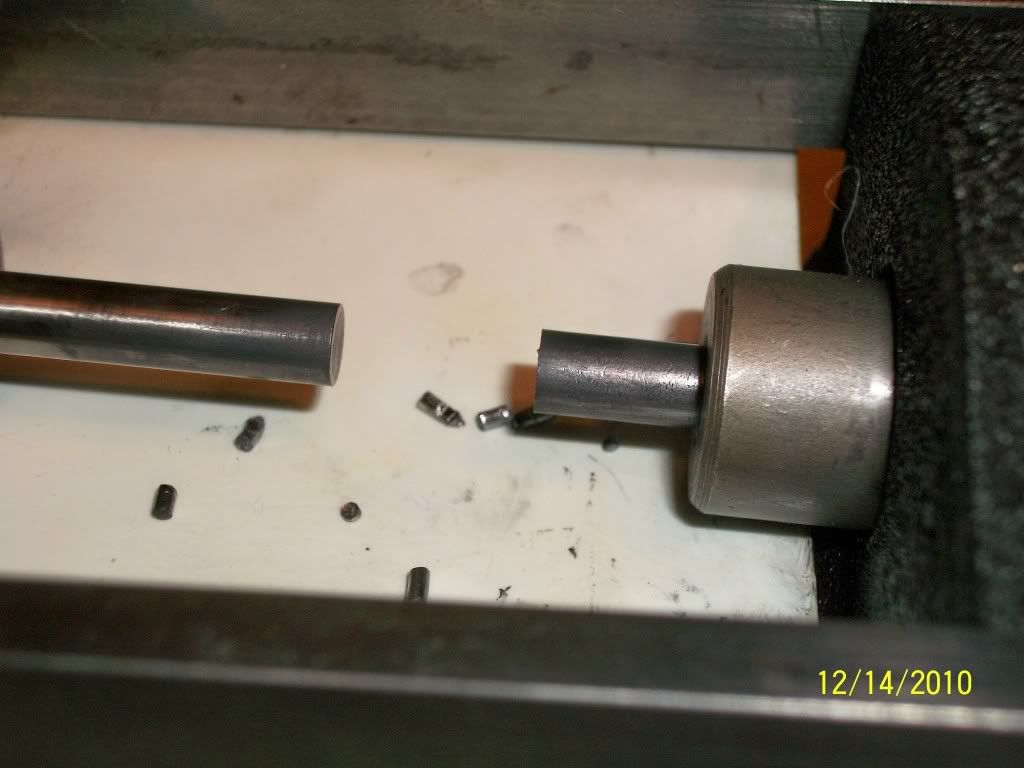
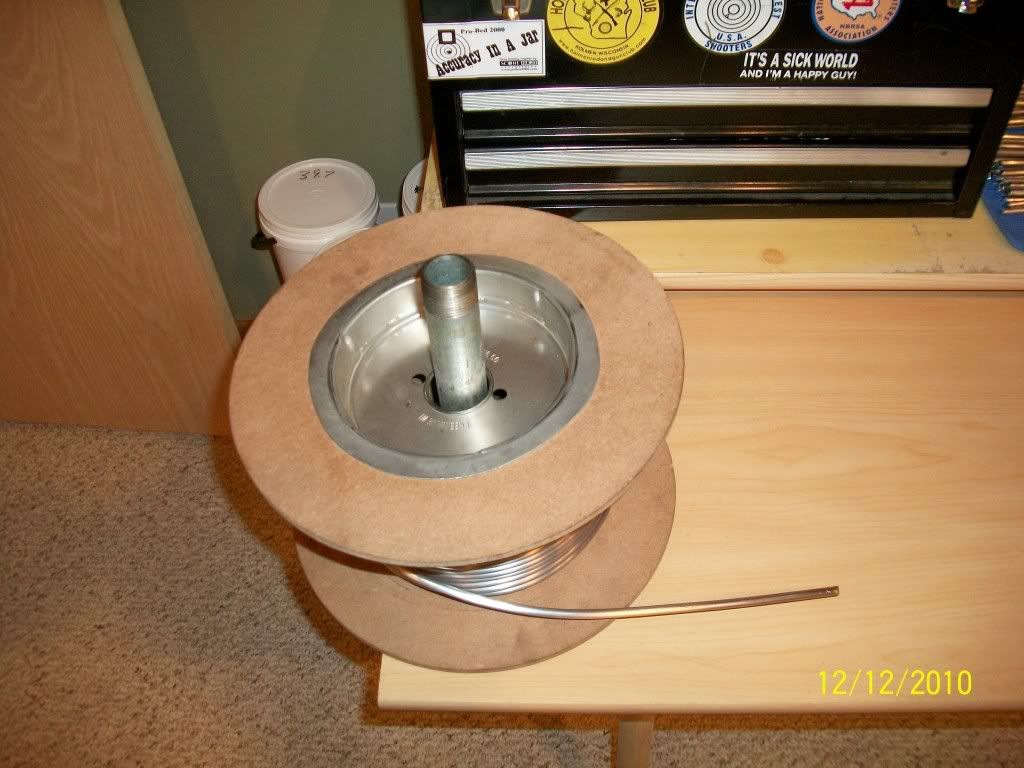
The spool of core wire drops over the spindle. Now I can pull the wire to the right and cut it to length.

4.jpg


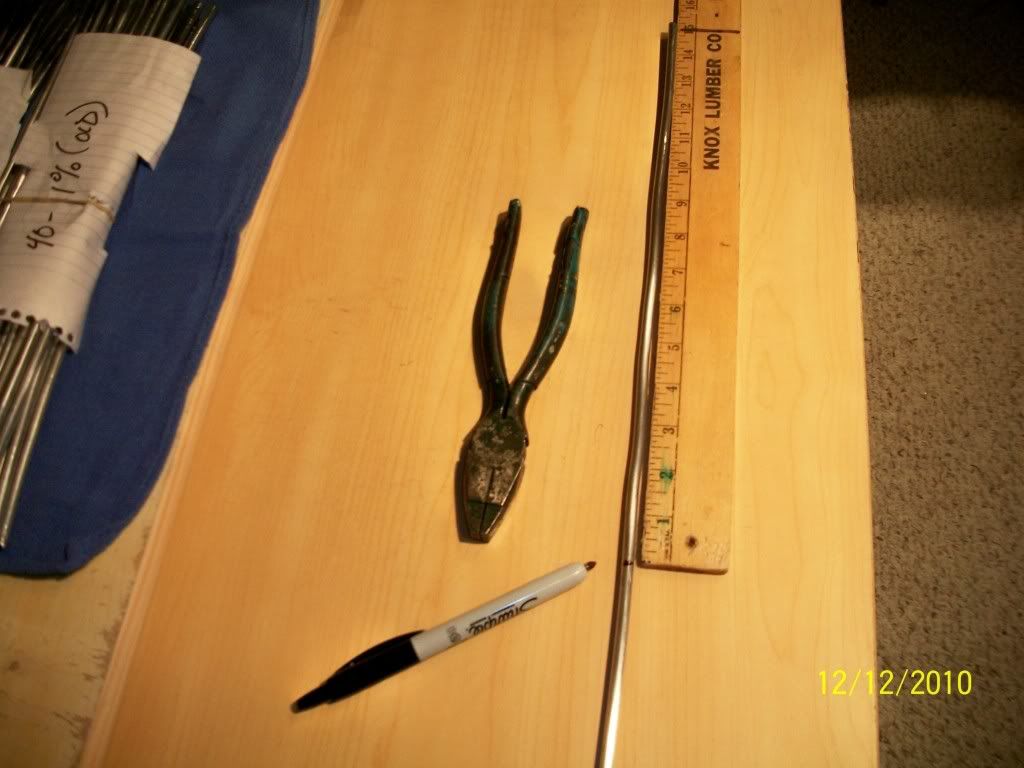
Pulling the wire off the spool.

5.jpg


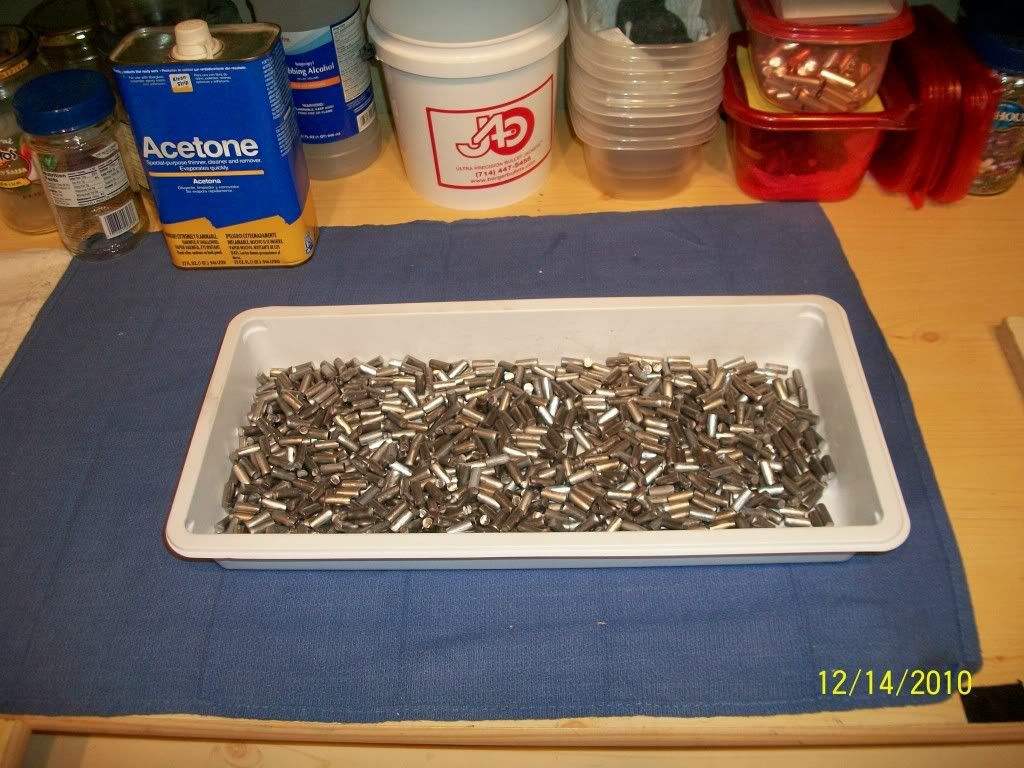
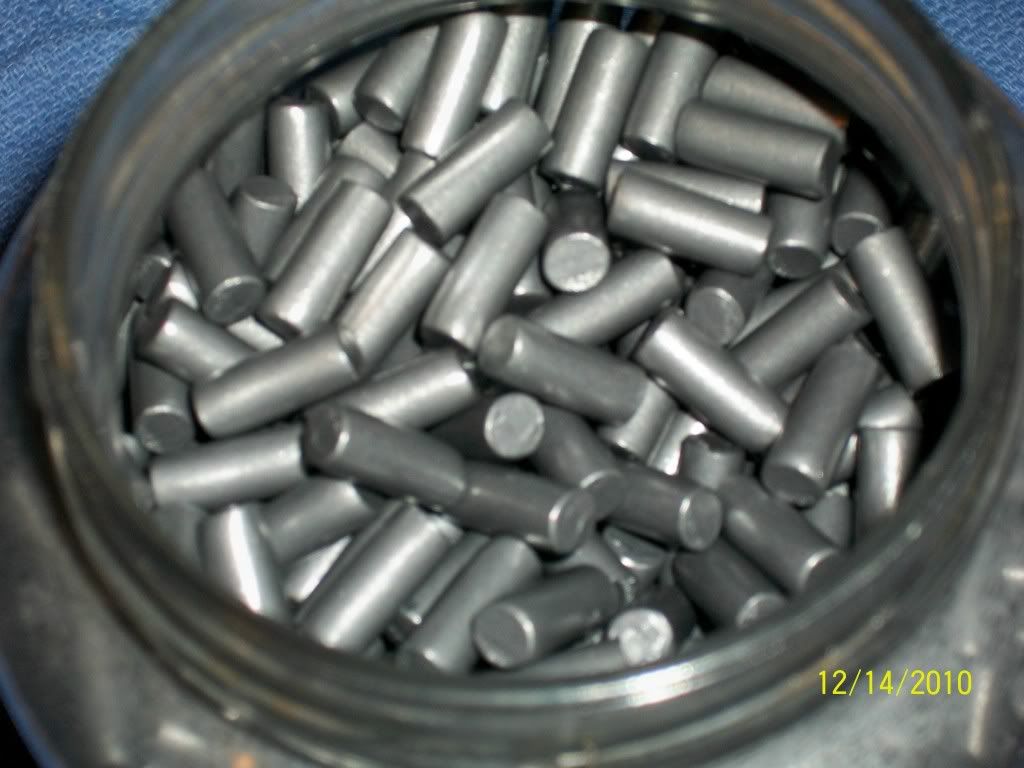
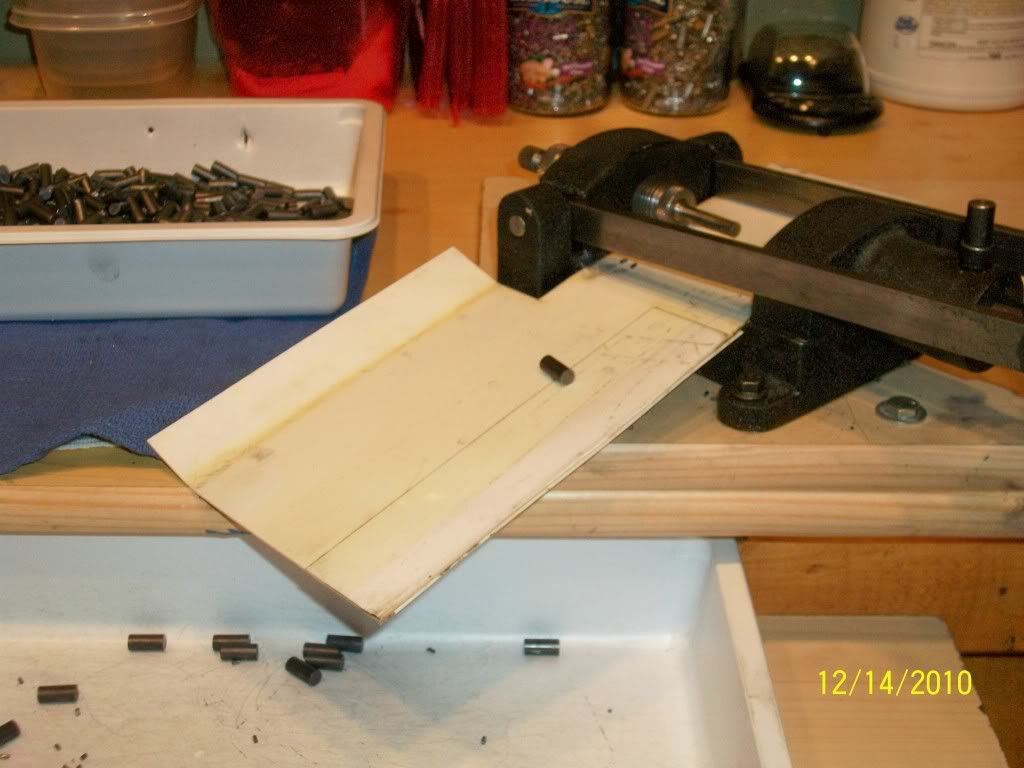
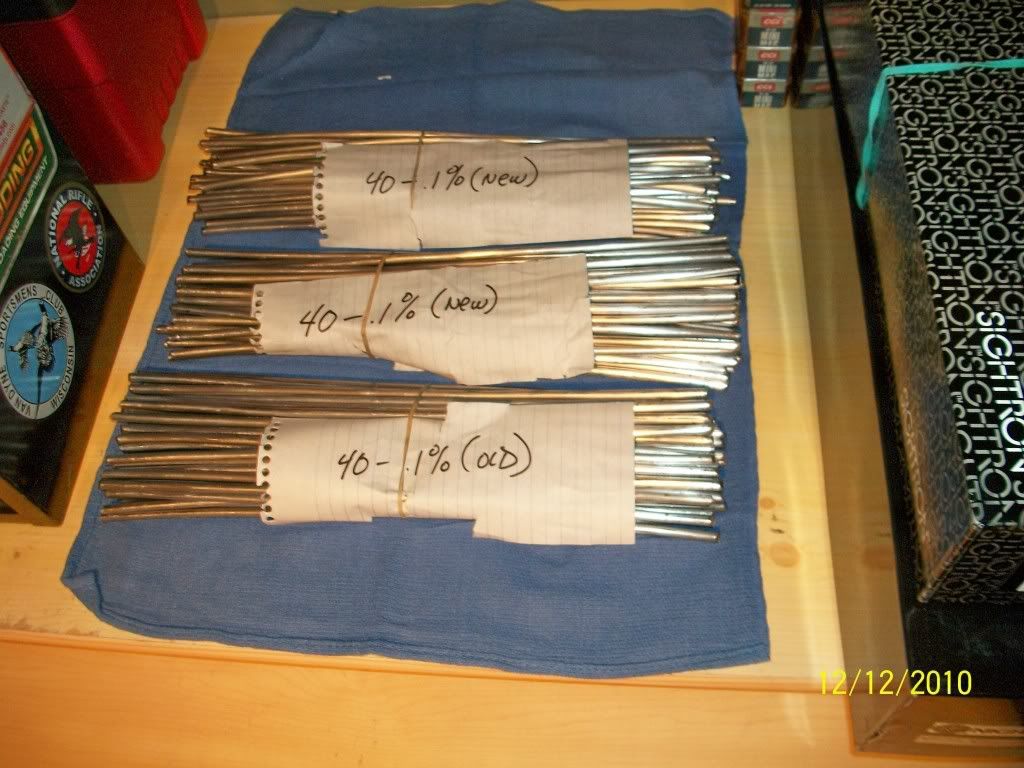
For the cores I'm making, I cut the wire into 15" lengths. This gives me 27-28 'cut' cores per stick. Basically, I figure 1,000 cores per 40 sticks and a few (115-120) 'free' cores left over. The 'free' cores fools my brain into thinking that makin' cores isn't completely horrible. ;)

6.jpg


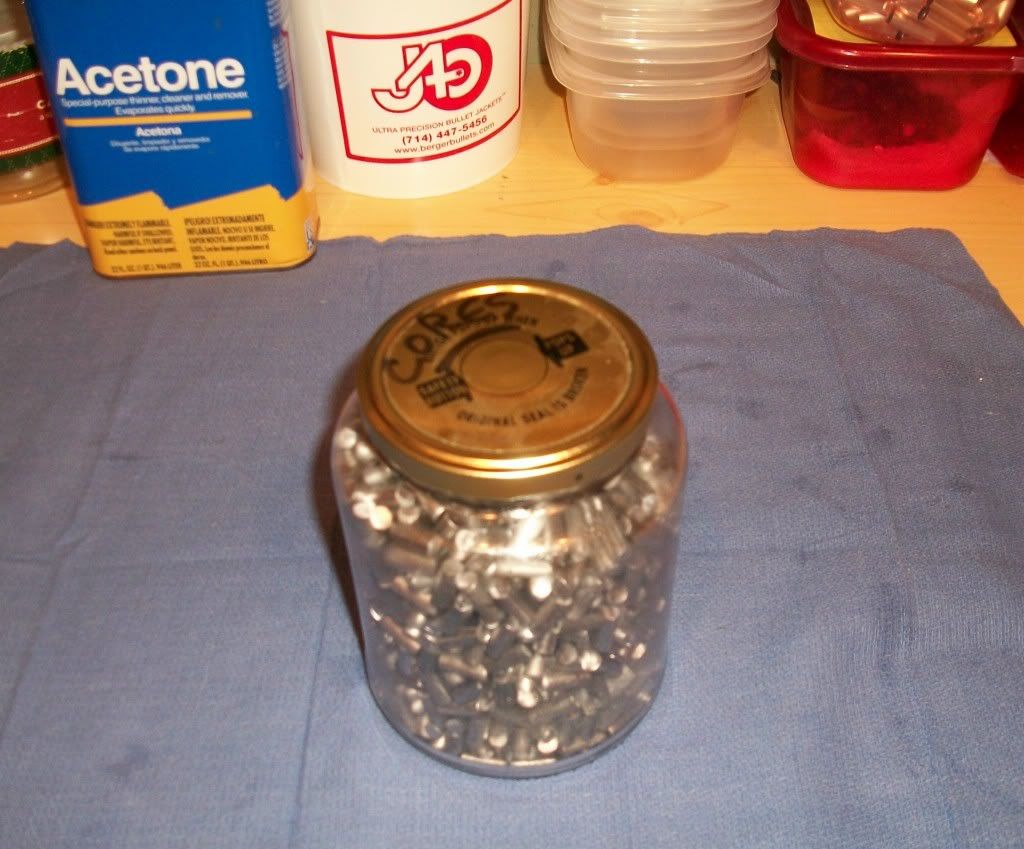
After I get 40 sticks cut, they're bundled together and marked. Next step will be cutting them to length.

7.jpg
 
For those of us the aren't bullet makers good pictures really do help a lot. The other threads helped out a lot but a pictures is worth a thousand words as they say.
 
Wonderful!

Thanks Al,

Another thread on bullet making. :)

Although I do not make my own bullets at this time, I wouldn't rule it out for the future.

Judging by the views and responses other threads on this subject have generated, I believe there is great interest in the process. Looking forward to following this one. :p

Gene Beggs
 
Al it will extra work taking pics but we all appreciate it! I'm sorta a newbie and shoot rimfire but i will be following your thread with interest! thank you.... joe
 
I just want to say this thread is going to ROCK in my world. Keep things coming in your progression to making bullets from scratch.

Everyone says it is NOT WORTH IT. I'll tell you. When you live in Manitoba and the cold winters that would be a way I could pass time. The best part would be when you see the results on paper and they are FAVORABLE results.

Keep it coming and great pictures.

Calvin
 
Al those look like they could be real Klein pliers there..... do you have a sordid construction history you're not telling us about?

Thank you for taking the time to do this pictorial

al
 
Al those look like they could be real Klein pliers there..... do you have a sordid construction history you're not telling us about? al

Yep, those are Kleins....good stuff and made in the USA. Never worked construction as a real job, but would probably be classified as an advanced diy'er.
 
Thanks for the positive comments. I'll add some more pics in the next day or so.

I would encourage anyone else that's making bullets to hop in and join this thread. Pics are always a plus.

Good shootin'. -Al
 
Hi Al. Great pictures. And a great idea. Thank you.
I am just getting started.
Went to a score match today. WWCCA during "The Great Blizzard of 2010". 1/2" when we started. 1-2" on the way home.
Got to shoot some of the bullets, that I made recently. Conditions were tough. Mostly white out. Some guys said they could not see target.
One guy stayed clean. I dropped a point. Last match there was a gust of wind. The only wind all morning. And I shot at the same time. Otherwise, the experiment was a success.
Yes. It is a great feeling to shoot your own. And come close to winning.
 
I don't have any spools of lead right now, but I have mine set up a little differently. I put a old barrel through the spool and lay it between two folding chairs, having it come off the spool so it is always pulling itself back into the chairs. My setup isn't nearly as pleasant to the eye or as neat as Al's, all of Al's operations are first class. I also cut the wire into sticks in lengths of 32", I like a little more wiggle room and I get 50 rough cores per stick. When I cut my wire to length I have a stop on the table so I don't have to measure each stick. On the last spool that I cut I got 86 sticks, that gave me 4300 rough cores,(roughly):).The next step for me is to lay the sticks on the table and straighten them by rolling them one at a time between a flat board, I them move them to another table and line them up twenty to a row, this gives me just over a thousand/20 sticks. The reason I strighten the sticks is because they feed into the cutter nicely without getting into a bind. I want to add here that this operation is for 118gr, 30 cal. bullets. Also like Al said, making cores is not nearly as fun as it should be.

Dan Honert
 
Last edited:
Thanks for the input, Dan. Like you, my next step is to straighten the sticks of core wire by rolling over them with a piece of hardwood.

Now it's over to the core cutter where we'll make big sticks into little pieces. Here's how the cutter is mounted. The white tray underneath is a disposable, single-use epidural anesthesia package. You'll see them a lot during my process.

1-2.jpg


Top view of the core cutter. In practice, the holes are lined up and the handle rotated to shear the material. The bushings that the wire goes through are fitted pretty closely to the core wire diameter, so it's well supported during the cutting operation. If you look closely, you can see the Allen head set screws that hold the bushings in place.

2-1.jpg


Here's how it looks with the bushings in alignment and ready to go. The Allen headed adjustment screw coming up from the bottom is how the weight of the cut core is determined.....shorter is lighter and longer is heavier.

3-2.jpg


The wire is fed through the cutter bushings, goes up against the stop screw, the handle is operated and viola'....a cut core plops into the tray. There's always a bit of a nub on the end of the sticks of core wire from the cutting plier, so I trim that off first.

4-1.jpg


Another shot with the stick of core wire loaded into the cutter. Now, repeat as many times as you want or until your sanity is at risk.;)

5-1.jpg


A cut core that's 2.5-3.0 gr. over what the finsihed weight will be works well for this setup. With other makers dies, this may be too much waste. My Blackmon core die has 3 'squirt' holes for excess material and unless all three of these are completely filled with 'squirt', the cores will drift a bit from the desired finished weight. Other dies with a fewer number of 'squirt' holes may be able to use use a cut core weight closer than what my setup requires. Don't know about that for sure...just know this setup.

Good shootin'. -Al
 
Last edited:
Dan, here's another idea on how to possibly work with your core wire.

Initially, I mounted my 'spindle' on the leg of one of my work benches and fed it off that. I changed it around to better fit the space I have to work in and also so I can sit on a chair and pull wire. I mean, if the brain is going to be numbed from repetition, the butt should at least be comfortable...don'tcha think? :D

wire.jpg
 
That looks like something I'm going to try Al, it is a better setup than I'm using and once done with the spool of
wire I could just unscrew the spindle and put it away.

Dan Honert
 
Okay....here's 1,000 'cut' cores. These took about 1 hr. to do, more or less.

1-3.jpg


Lube is applied to the sides of a glass jar, then the cores are dumped in. Lots of lubes work for this step...Marvel Mystery Oil is a good one. I've also used a 50/50 mix of STP and Mobil 1 5W20.

2-2.jpg


Then the glass jar is plunked into the Thumblers Tumbler for 30 minutes. This model Thumbler (AR12) has a hexagonal shaped rubber barrel, so the jar just kind of flops around inside as it turns. This ensures a good distribution of lube. You don't want the jar too full of cores, as they need some room in the jar to move around.

3-3.jpg


After 30 minutes, they look like this...sort of a dull grey. Now, they're ready for the core swage (squirt) die.

5-2.jpg
 
Al,

I know damb little about making bullets but I have question with the process at this point. You mentioned cutting the little nub that is left on the end of each stick first, that is the mis-shaped nub caused by the linemen's pliers, correct? Would it be possible to mount the spool of wire above the core cutter and run the lead wire through a "track" straight down to the cutter? This "track" would help straighten the wire and since you would be cutting right from the spool you wouldn't have a bunch of little nubs as waste. I assume both ends of each stick end up as a form of waste.

By the way, thank you for your time and efforts this is really turning out to be a great thread.

Paul
 
Define Track...

As refered to in my post above I am thinking about a track similar to that of what the wire for a wire feed weld runs through. Since you wouldn't want the wire distorted in any way, the feed mechanism with is a knurled wheel would have to be left out. Anyway this knurled wheel goes against the wire and is powered as the wire runs through a sheeve, (grooved roller bearing). I'm thinking the wire could feed through a set of small bearings or pulleys, to a forcing cone and through a long spring. The spring would end at a tube and the tube would output to a free area where you could pull the wire straight to the cutter. The spring would help keep the wire inline until it got to the tube which would take the curl out of the wire.

You would pull down gently each time to get the core wire to hit the stop, once at the stop, cut the core and ease the next one into place to cut.

With this method you might want an anti free wheel device on the shaft which holds the spool, you could get humming right along so fast that when you stopped you would get a "birdnest", much like on a baitcasting reel.
 
Paul, something along those lines would sure work. Randy Robinett has a slick core cutter that is made from a motorcycle crankshaft....it's 'way cool. Hopefully, he'll post a pic or two of it on this thread.

Thanks! -Al
 
Time to squirt (swage) cores. The core die is screwed into the ram of the press. The press I use is the horizontal one from Larry Blackmon. I know most people use an upright press, but like Led Zeppelin sang: "The Song Remains the Same".

1-4.jpg


Then the punch holder with the core punch is threaded into the press.

2-3.jpg


A cut core is held against the core punch and the die advanced over the core and punch. The small extrusions of material coming out of the squirt holes in the die are the excess material (weight)....thus why a core swage die is often refered to as a 'squirt' die. Plus, 'squirt' is way more fun to say than 'swage'.....;)

3-4.jpg


As the handle is raised, the die retracts into the press and the 'squirts' are sheared off. What's sticking out of the die (on the rt. side) is the finished core. You can see how nice and square the ends are. The core is also perfectly round, since the swaging process brought it up to the i.d. of the die. You can see the squirts of core material lying on the white drop chute.

4-3.jpg


You adjust the lock ring on the punch holder to move the core punch in/out until you get to the desired weight of the core...just like adjusting a f.l. die in a press. With the weight of the jackets I'm using, a 77.3 gr. core is what I'm after.

5-3.jpg


The 'squirted' cores roll down a styrene chute and into a plastic tray. The lubed 'cut' cores are in the tray at the top, waiting their turn in the squirt die.

6-1.jpg


Things can get a bit messy at this point as you're handling the lubed cores.

7-1.jpg
 
Last edited:
Back
Top